Wednesday, August 29, 2018

How to Convert a Video from MKV to MP4 Using VLC?


If you have a video in MKV format, and you want to open it, but it’s not opening because some programs like Sony Vegas Pro doesn’t support this format, then you’d possibly think that how you can convert this format into some different format. I have just brought you the simplest way to do so. Before you go ahead, you need to understand this method, and you will need to know that media file formats are not less than the containers (for example, MKV is Matroska). However, every format encapsulates a set of streams, generally one audio and one video stream. Now, each stream has been encoded with the help of some particular codec.

However, the MPEG4 Video is almost the same codec that is usually used with MP4 file format! So, that means can easily convert an MKV file to just different container format. We can do this by rewriting streams as-is without actually converting video or audio – which should be very fast and is more unlikely to cause any quality loss.
The program you need to convert your video from MKV to MP4 is VLC media player. As this program has been featured with its own set of codecs for many video and audio formats, it doesn’t tend to depend on codecs that are installed in the Windows. The VLC media player is just an overlay on top of a robust library that also performs different things, like converts files or streaming video over a network. Follow the steps mentioned below to convert an MKV format file into MP4:
  1. Launch your VLC media player.
  2. Then from the main menu, you will need to select the Media option.
  3. Tap on the Convert/Save option.
  4. On the File tab, you have to tap on the Add button.
  5. Here you will need to choose the MKV file you want to convert.
  6. After choosing, it will be added to the list. (Alternatively, you may also drag & drop a file into the directory.)
  7. Tap on the Convert/Save button.
  8. Now, you need to select the Profile Video – H.264 + MP3 or MP4.
  9. Then you will have to tap on an icon button that has a hint: Edit selected profile.
  10. Here, you have to leave MP4/MOV selected on the Encapsulation tab.
  11. Then you’ll need to check both Video and Keep original video track on the Video codecs tab.
  12. Now, on the Audio codec tab, similarly, you need to select both Audio and Keep original audio track.
  13. Then just tap on the Save button.
  14. In the Destination Selection tab, you have to tap on the Browse button. Doing so selects the directory and file name for your destination MP4 file.
  15. Tap on the Start button.
  16. You will get to see a progress bar in the main window as your file is converted.

Note: After this process, your VLC media player might hang in an infinite loop so you may need to kill it using system “Task Manager,” but it doesn’t matter because your destination file has already been created.
Thanks for reading my blog; I hope this information will be useful to you.
Jack Tucker is a Microsoft Office expert and has been working in the technical industry from last 10 year. As a technical expert, he has written technical blogs, manuals, white papers, and reviews for many websites such as office.com/setup.

Tuesday, August 28, 2018

How to Prevent Your Apple Laptop from Overheating?


The problem of laptops overheating has been around for years. The cause behind this is rather simple. Laptop manufacturers have been trying a lot to make their product handier and smaller. Consequently, in order to accomplish their target, they must have started to make the parts, such as the hard drive, motherboard and more, handier and smaller and. However, they also have to set all these components and parts closer to each other. As we all know that the microprocessor, hard drive, and motherboard all of these tend to produce heat and the closer they are placed to each other, the more concentrated the heat becomes. Although, we have the fans that are built into our laptops to cool these components down, yet these fans also cannot work efficiently in such tight quarters. Add to this the fact that it’s easier said than done for the heat to escape, and you have overheating laptops. Whenever your computer overheats, it is more likely to fail in doing the tasks it is meant to. Here we have brought some tips for you that are going to help you prevent your apple laptop from overheating.

  1. Avoid putting your laptop on anything like a cushion especially when it is switched on. The soft material of a cushion could get in the way of the airflow vents, mainly the rear vents, which could be the cause for your laptop to overheat.
  2. It is highly recommended not to put anything over your keyboard when the laptop is operating in the closed-lid mode. Doing so is expected to cause your computer to turn off and on frequently. And this could generate great heat and could also drain the laptop’s battery.
  3. Remember to shut down your laptop overnight and do it daily to let it cool off. If you don’t use it regularly during the day, then you can set it to go into standby mode automatically when not in use. This is definitely going to save power and also, condense heat output from the components of your laptop.
  4. Ensure that your laptop is always switched off when it’s in your backpack. You should avoid carrying the laptop in a bag when it’s on because doing so can block the vents on the computer and cause it to overheat. Also, it reduces the life of the components of your laptop or worse; can cause a fire. Thus, the heat may also distress the battery life and can cause an explosion too.
  5. Always try to keep the air vents clean. Dust accumulates on the vents of your laptop that can obstruct them. This dust will stop your laptop from working efficiently. A small electric cleaner can help you clean dust off the vents. Your laptops can suck up lots of dust. However, it’s because everything in the computer is packed together so tightly, it makes these specks of dust is even more dangerous for your laptop. When the cooling fans are designed to run all the time, it’s just a matter of time before the system starts overheating.
Thank you for reading my article: I hope this information will be helpful to you.
Jack Tucker is a security expert and he writes about Cyber security, cryptography, malware, social engineering, internet and is working at norton.com/setup

Friday, August 24, 2018

Fatal Error C0000022 in Windows Solved


After updating the Windows 7, 8 or 10 OS in your system, the possibility of getting Fatal Error C0000022 are high. The system displays this fatal error when you restart or reboot your computer. While restarting the system, a splash exhibits on the screen and the Windows starts applying updates. The error occurs a while later stating Fatal error C0000022 applying update operation 348 of 84901 (bfsvc.exe) on the screen. A lot of users reported the error and they do not understand the reason for the error.
It has been said that improper Windows update installation can result in corrupting the Windows Update files, bringing the error in Windows system. Malware or any third party tool can also be responsible for the error, and the consequently Windows will fail while restarting. You can save your data from safe mode, but some users said that it is almost impossible to back up their important data. As it could be a malware or any unwanted program in your system, then you should run a full system scan or else follow the steps to get rid of the fatal error. There are multiple methods to resolve the problem, so let’s check how to solve the fatal error C0000022 in Windows.

1.    System Restore
·         If your system doesn’t manage to restart successfully, then try System Restore.
·         Press Shift key constantly while the computer is restarting.
·         Select Repair your computer.
·         Go to Troubleshoot and then Advanced Options.
·         In the Advanced Options, click System Restore.
·         The system will perform restoration and fix the problem automatically.
·         If it doesn’t work, then move to next method.
2.    Download Updates Manually
·         In case the error persists, then download the updates manually from Microsoft website.
·         Windows will update, but it is possible that you will receive the error message again.
·         In that case, you must wait for the company to release the patch of updates.
·         Till then uninstall the updates by selecting Update & Security in Settings.
·         Click Update History.
·         Again click Uninstall Updates.
·         Find the latest installed updates and right click them.
·         Select Uninstall and reboot your computer.
3.    Uninstall Updates by DISM Command
·         Open Command Prompt from Start menu search bar.
·         Click to open the prompt.
·         Type DISM.exe /Image:C:\\ /get-packages and press Enter.
·         Locate the name of the update.
·         Copy the name.
·         Type DISM.exe /Image:C:\\ /remove-package /packagename:(enter the name of the update) and press Enter.
·         Now, reboot your system.
The methods mentioned above should work correctly to get the essential results. The fatal error C0000022 must not occur but if the error persists, then either reinstall the Windows or contact the Windows support service to get the problem resolved.
Jack Tucker is a Microsoft Office expert and has been working in the technical industry from last 10 year. As a technical expert, he has written technical blogs, manuals, white papers, and reviews for many websites such as office.com/setup.

How to Start Syncing Instagram Contacts with Facebook?

Previously, we have seen the ability to sync the phone’s contact with the Facebook’s Messenger app, which also intended to integrate most of its services with Instagram. But now, Facebook has brought a new feature to its Messenger app and that is meant to allow users to sync all of the Instagram contacts to the Facebook Messenger.
Note: Before you begin using this feature, you have to make sure that you an updated version of Messenger and Instagram, and you are logged into both apps using appropriate credentials. However, this feature is now available to all the Facebook Messenger users across the globe.
Follow the steps given below to start syncing contacts to the Facebook Messenger:

  1. Launch your Facebook Messenger app. You can do so from the launcher or shortcut (if you have made one).
  2. Click on the ‘Profile’ icon. You will find it in the top right corner of your app.
  3. Then you need to scroll little down and click on the ‘People’ option.
  4. From here, you will have to select the next option — “Sync Instagram Account.”
  5. If the Instagram app has already been Installed and configured on your phone, you just have to click on Connect to (your name) button.
  6. Doing so will set up the contact sync process on your device.
  7. As soon as the process is complete, you are going to be able to see all of your Instagram contacts into the Facebook Messenger app.                                                                            Note: If you also want to sync your phone contacts to Facebook Messenger, then you can enable the ‘Sync contacts’ option from the ‘People’ tab.
For any reasons, if you want to disconnect the Instagram account from Messenger, you can do it too just by following the easy steps given below:

  1. Launch the Facebook Messenger app.
  2. And go to the ‘People’ tab by clicking on the profile icon.
  3. then you just need to click on the ‘Instagram Account’ option
  4. Doing so will take you to a tab where you can disconnect your account from syncing the contacts by selecting the ‘Disconnect’ option.                                                                        Thank you for reading my blog! I hope that this information is going to help you learn how to sync your Instagram contacts with Facebook.
Jack Tucker is an inventive person who has been doing intensive research in particular topics and writing blogs and articles on HP Printer Support, Brother Printer Support and many other related topics.

Thursday, August 23, 2018

You Can Now Take Measurements on Your iPhone! Know How!

If you have recently updated your iPhone’s operating system to iOS 12, you may have noticed the new app named “Measure.” Basically, the app is a measuring tape and a ruler all in one and you can use it to get rough measurements of the items around you. The app released by Apple is capable of using augmented reality to measure objects using your phone’s camera!
However, one needs to bear in mind that since iOS 12 is in its Beta stage, the app may or may not be updated as per Apple’s wishes. Given how handy the app is, we definitely hope that the feature is here to stay.
Here’s how you can use the app to take measurements:
Use Measure for Straight Lines
  1. Launch the Measure app, the app will give you a prompt asking you to move your iPhone around so that the app can analyze the object that you wish to measure.
  2. Point your phone’s camera towards the object and move it around until you see a white circle with a dot in the center.
  3. Align the dot with the corner of the item that you wish to measure and press the white button bearing the “+” sign in the middle. If you have aligned your camera properly, the dot will snap to the corner as you approach the object.
  4. Once you have pressed the measuring button, move slowly from one end to the other. Once you reach the other end, press the measure button again. If you make any mistake while taking the measurement, use the Undo or the Clear button located in the top-left and top-right corners (respectively) of your screen.
  5. Follow the steps given above to once again begin taking the measurements. If in case you did not manage to cover the ends, instead of doing over, use your finger to drag the end-point dots on to move it to the desired starting/end point.
  6. The measurement will be displayed on your screen along with the trajectory that you have followed to measure the object.
  7. If you wish to save the measurement, click on the shutter icon present on the bottom right corner of your screen. A photo of the measurement will be taken and stored on your device. You can copy the measurement by tapping on the measurement and choosing copy from the pop-up menu.
With the Measure app, you can take quick measurements without having to rummage through your kitchen drawers while looking for the measuring tape. It may not be accurate enough to start carpentry using the app, but it is useful enough to get an approximate idea about the length and breadth of your furniture.

Jack Tucker is a Microsoft Office expert and has been working in the technical industry from last 10 year. As a technical expert, he has written technical blogs, manuals, white papers, and reviews for many websites such as office.com/setup.

Tuesday, August 21, 2018

How to Remove and Avoid Red-Eye Effect in iPhone Photos?

How frequently does it happen – you have a brand new iPhone, have clicked some stunning photos at your colleague’s wedding, and are eagerly waiting to show them to your co-workers- only to find that everybody, including the bride and the groom, looks a part of the Twilight cast with their red eyes? Do not fret – red eye in pictures is an extremely common issue that everybody who uses a phone or camera with a flash to take pictures faces. This common issue can be fixed easily. Here is how you can remove red-eye in photos in an iPhone.


Remove Red-Eye Effect Using the Photos App

1. Unlock your iPhone.
2. Slide through the apps and locate Photos.
3. Tap on the Photos app to launch it. Its icon is rainbow hue with a white background.
4. Now, at the bottom of the app, on the right side, tap on the Albums icon.
5. If the iCloud Photos Library is enabled, then tap on All Photos from the list of options in the Albums menu.
6. If the iCloud Photos Library is not enabled, then tap on Camera Roll option in the Albums screen.
7. Scroll up to locate the picture.
8. Just tap on the picture you want to edit.
9. When the image opens, tap on the Edit button located at the bottom right corner of the iPhone’s screen.
10. Now, select the Red Eye Correction option located at the top left side of the screen. The icon is shaped like an eye.
11. If the image was snapped without using flash, then the red eye will not appear.
12. Now, just select the area where you want correct the red-eye. Tap on all the red eyes.
13. If you are not satisfied with the results, then simply tap on the eye once more, and the changes will get removed.
14. Tap on the Red Eye correction option at the upper left corner of the screen.
15. Now, the main Photo Edit screen will open.
16. Tap on the yellow Done button located on the bottom left side of the screen. Doing so will save all the changes made.

17. If in future, you want to restore the original picture, then directly go to Edit. Tap on the Revert option located in the bottom left side.
How to Avoid Red-Eye Affect in Photos?

· Red-eye effect occurs when the flash of the camera in low or dim lightning reflects from them, and the pupils look red in the resulting image. If you are taking a picture in dark or low lightning, then turn off the flash.

Here is how you can turn off the flash in the camera:

1. Open the Camera application.
2. Tap on the Flash option located at the extreme top left side of the screen. It is represented by a bolt sign.
3. If you select Auto Flash, then the flash will automatically be enabled when the lightning is either low or non-existent.
4. Select the Off option if you do not want to use flash while taking pictures and videos.
· To avoid red eye, you can ask the image’s subject to shift their gaze. Instead of looking directly at the lens, they can look sideward.

Jack Tucker is a security expert and he writes about Cyber security, cryptography, malware, social engineering, internet and is working at norton.com/setup


Monday, August 20, 2018

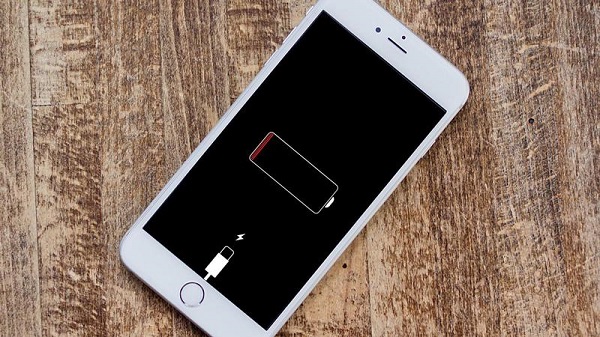
How to Detect Which Apps Are Draining Your iPhone Battery

Our lives are slowly but steadily getting more and more dependent on electronics. A smartphone has become one of the most important and integral part of our life. We are way past the days when we would have to memorize contact numbers, ask around for directions, carry a camera to click photographs and get a review of a restaurant through word of mouth. With a smartphone, all of these are available at our fingertips. However, more than these devices, our lives revolve around the batteries that power these devices.


iPhone and battery issues seem to be going hand in hand. As the charge slowly leaves your iPhone, you keep hoping that there was some way through which you could prolong its life. The simplest way to increase your battery life and in turn your phone’s performance is through identifying the apps that are draining your battery and turning it off. This will save up your battery’s juice thereby powering up your device for a longer duration.

Steps to identify apps that are always running

Apps that are constantly running on your phone take up the most battery. Even if you have exited the app, chances are that they will be running in the background and constantly syncing or checking information to notify you of any message or downloaded data. Furthermore, some apps keep your screen on while other apps, like the ones that run games or play videos, can put a strain on your phone’s internal processor.

You may not have to stop using these apps, but it is important to identify the apps that are always running. Follow the steps given below:
Launch the settings of your iPhone.
Scroll below until you find the option for “General” settings
Tap on Background App Refresh.
Your phone will now display a list of all the apps that can refresh their content when you are connected over a cellular or WiFi network. If you do not use the particular app as often, you may turn off the app as it will preserve your battery.
Tap on the toggle switch to turn the app refresh on. The switch will go from green to white.

Steps to identify the battery draining apps

You can easily identify the apps that are draining your battery. Here is how you can check the list of apps:
Launch the settings of your iPhone
Tap on Battery
You can see the battery usage of your phone and the percentage of battery that has been used up each app for the past 24 hours.
You can also preview the amount or percentage of battery used for the entire previous week too.
When you tap on the app’s name, you can see the breakdown of how much of the battery was drained due to the active use of the app and how much of it occurred due to the app running in the background.
If an app is taking up too much battery while being used in the background, you can turn it off especially if you do not need constant updates from the app. Do so by following the steps given above.

Jack Tucker is a security expert and he writes about Cyber security, cryptography, malware, social engineering, internet and is working at norton.com/setup

Source URL : https://nortonkeyactivation.com/how-to-detect-which-apps-are-draining-your-iphone-battery/

Friday, August 17, 2018

How to Resize Pictures on Mac

Mac’s Preview tool is amongst its most underrated features. Preview is not just for viewing images. With Preview app, pictures can be quickly and effortlessly resized for free. You do not have to install a third-party app or go online to resize or crop an image. You can also crop the image and discard the unnecessary portion. Here is how you can resize and crop images using the Preview app on Mac:

Resize the image with Preview
You can resize an image by going to Preview. With Preview application, you can resize the whole picture without having to crop it.

1. Go to the picture you wish to resize. If you cannot find it, then go to Finder, and look it up. Click on the image from the search results.
2. After locating the image, either drag it and drop it to the Preview. Its icon is located in the Dock. Alternatively, right-click on the picture and click on Open With. Select Preview from the list of options.
3. Now, the Image Preview should open.
4. In the top bar, below the file name, you will see an Edit option. Click on it.
5. Now, you will be able to see a taskbar on the upper side of the Preview screen.
6. Click on the Tools tab. Select Adjust Size from the drop-down menu.
7. Now, an Image Dimensions box will open.
8. Decrease or increase the resolution of the picture.
9. You can also increase or decrease the height and width of the image.
10. Check if you want to scare proportionally or resample the image.
11. If you tick the box before Scale proportionally, then the picture will not be warped.
12. Click on the OK button after making all the relevant changes.
13. You can now see whether the picture has been resized how you wanted or not.
14. Save the image.

Crop the image with Preview app
Preview app also allows you to crop the picture and resize it. Here is how you can do that:
1. Open the desired picture with Preview.
2. Click on the Edit button located at the top of the Preview screen.
3. In the upper left side of the screen, click on the rectangular icon below the View tab.
4. Doing so will prompt a menu. Click on Rectangular Selection from the list.
5. Now, just select the portion of the image you want. Use your mouse to select the rectangular section.
6. After that, click on the Crop option located in the upper right corner of the screen.
7. Now, save the file.

Jack Tucker is a security expert and he writes about Cyber security, cryptography, malware, social engineering, internet and is working at norton.com/setup

Thursday, August 16, 2018

How to Make Your Printer Outlast You?


Printers are a commonly used piece of hardware, but they are not as frequently used as smartphones or computers. People often neglect to take care of their printer. And the printers, usually due to negligence and lack of maintenance, start functioning poorly, or stop working at all. By just taking some measures, you can make sure that your printer is well-maintained.
If you have a printer, but you do not know how to take care of it, then you must follow some basic printer maintenance tips to ensure that its condition does not deteriorate. If your printer is acting up and throws fits from time to time, then by taking care of it you can nurse it back to health. Here is what you need to do to make your printer last a lifetime:
Manually clean the print head
Firstly, you absolutely need to clean the printer’s print head on a regular basis. Doing it once every few weeks should be fine. To get the most out of your printer, you need gather some supplies(lukewarm water and paper towels) and wipe the print head clean.
Remove the accumulated debris and dust
From lack of use, dust builds up inside the printer. Also, external debris may affect the cartridge. It may also lead to paper jamming. Get a lint-free soft rag and dab it in a little water or rubbing alcohol. Using the slightly wet rag, wipe the insides of the printer gently yet thoroughly.
Get a maintenance kit
Funding in a maintenance kit for your printer is a wise decision. It will consist of printer parts which you can use as and when they need to be replaced. With the passage of time, the machinery undergoes wear-and-tear. Hence, get a maintenance kit for your printer.
Get good toner cartridges
Nowadays, there is an array of options available for toners. While many people often go for the cheapest option, it may not always be a right decision for your printer. Not only do bad quality toners generate bad prints, but they also adversely affect the hardware of the machine.
Carefully replace the toner cartridges
You must be extremely cautious while handling toner cartridges. IF you are going to be using the printer frequently, then you must go through the toner replacement instructions given in the printer’s manual. Also, if you have invested in a low-quality cartridge, then you need to be extra cautious while handling them, considering how dainty they are.
Jack Tucker is an inventive person who has been doing intensive research in particular topics and writing blogs and articles on HP Printer SupportBrother Printer Support, and many other related topics.


How to Delete User Profiles on PlayStation 4

In one PS4, one can create a maximum of 16 user profiles. However, sometimes managing multiple profiles gets difficult. Or the user may accidentally set up a new user profile and then regret it. PlayStation 4 offers an option for removing user profiles. Here is how you can delete a user profile from PS4:


Remove other user profiles from the primary account
1. Firstly, you need to sign in to the primary account.
2. Power on the console and key in the sign in credentials for the primary account.
3. Make sure that you sign in using the primary account credentials as only the primary user is authorized to delete user profiles.
4. In the main screen, open the list of options.
5. Navigate to the right and locate the Settings option.
6. Hit the X button and choose Settings.
7. In the Settings screen, locate the User Management option.
8. Now, click on Delete User.
9. Now, scroll through the list of profiles and select the one you wish to remove.
10. Hit the X button to remove the profile.
11. Then you will be prompted to confirm the removal.
12. Follow the on-screen guidelines and remove the profile.
13. Now, just check whether or not the profile was successfully removed.
14. Sign out of the PlayStation. After that, sign in again.
15. Check the Options and see if the profile is still listed. If you cannot find it, then it means that the profile has been deleted from the PS4.

Remove user profiles by conducting a Factory Reset
1. Power on the PlayStation.
2. After that, enter the sign in credentials and login to the primary account.
3. If you are signed in from another account, then log out and sign in again with the primary account.
4. When you are at the main screen, move the joystick towards the left for the Options menu to come.
5. Now, keep moving in the right direction until the Settings option comes. The Settings option will be denoted by a toolbox icon.
6. Hit the X button to open Settings.
7. In the Settings screen, locate Initialization.
8. Go to Initialization and select Initialize PS4.
9. Click on Full and then follow the on-screen prompts.
10. Now the PlayStation will get restored to its factory settings.
11. Do not power off the PlayStation while the factory reset is going on. It is a long and tedious process, so be patient.

Jack Tucker is a Microsoft Office expert and has been working in the technical industry from last 10 year. As a technical expert, he has written technical blogs, manuals, white papers, and reviews for many websites such as office.com/setup

Tuesday, August 14, 2018

Five Tools to Make the Most Out of Netflix


Nowadays, all the content streaming services like, Hulu, Amazon, Netflix is the most popular streaming services which allow the users to easily watch their much-loved shows apart from the time, at any places.
In this article, we try to provide you the information about some best tools only to enhance your Netflix experience on Windows PC. These five tools will help you to make the most out of your favorite shows of Netflix by providing some additional playback features like custom subtitles, advanced bitrates settings and also help you in finding the best shows on Netflix.
Tools to Make the Most Out of Netflix
Netflix provides you instant access to the huge content on any of the devices. With the use of Netflix’s newest awe-inspiring feature, users can easily watch their favorite shows on any internet connected devices like Smartphone, tablet, gaming console and also smart TVs. This streaming service allows the users to enjoy a binge-watching direct from its enormous universal content library without even having to watch any of the commercial content in the middle. One of the most amazing features of the streaming app is the flexibility it provides for resuming and pausing your watching for the later period.
Moreover, Netflix has a wide content which varies according to the geography. Best is always not perfect so here is one drawback of this streaming app is that user will be displayed with the show which depends on where they reside. Additionally, sometimes it gets awkward to find the TV shows or Movies of your choice out of huge options.
Though there s always scope for improvements, so we try to provide you a list of tools which can help you to enhance the streaming experience in Netflix.
1- Super Netflix
The Super Netflix is one of the best tools for every user if you are looking for all in one Netflix tool. This is a very impressive tool for every user. This Chrome Extension allows you to easily change the quality of your video with just a single toggle, and also allows you to watch your favorite show without any spoilers and it will also help you in auto skip intros. It will also let users to upload custom subtitle files.
2- Flicksurfer
If you are shabby by scrolling down the huge library of Netflix only in search of some amazing shows, then you don’t need to worry about it. The FlickSurfer tool has made it tremendously easy to find the highest-rated content on the Netflix at any specified interval of time. Some users can bite down by content like movies, TV shows, and also genre. Moreover, the FlickSurfer.com also provides you the litheness for sorting the contents thus by the Netflix user rating, IMDB rating, Rotten Tomatoes rating, or an average of IMDB, Rotten Tomatoes and also the most important user ratings.
3- NetFlix Roulette
Some widespread contents which are available on Netflix might sometime confuse the user to decide that what actually they want to watch out next. The Flix Roulette/e will help you in making your task very easy by arbitrarily picking the show and also cease you from the problem of finding content out from the vast list.
4- SubFlicks
Sometimes, the user wants a subtitle for their show, now it’ is very easy with the Subflicks.com. The tool will allow you to download any subtitles files easily and also upload the same on Netflix. However, to enable this, you need to do is to download the “.srt” format subtitle form and also convert it to.“DFXP file.” Once it is completely done, then this file can be easily used on the NetFlix via the Smartflix as the channel.
5- /r/NetflixBestOf
There are too many options on Netflix so that users are confused about what to watch next on the Netflix? But don’t worry; you can easily get suggestions from the Reddit sub-thread called as /r/NetflixBestOf. This sub-forum makes things easy for the entire user to check their next title to watch, out of all the extensive content in the library.

Monday, August 13, 2018

How to Fix Google Pixel Wi-Fi Problem


Pixel, another major Android device launched by Google, is no doubt the most awaited product for people. Its impressive design and features make it a unique smartphone. But this stunning phone too has problems which are more prominent to its users. Sometimes, the phone doesn’t connect with Wi-Fi and it is really frustrating for the people and sometimes it connects but doesn’t load any webpage. Do you own Google Pixel phone? Are you also facing the same problem right now? Don’t worry because there are solutions to fix the issue regarding Wi-Fi connection.
How to Fix Google Pixel Wi-Fi Problem
Let’s begin with the solutions to resolve the issues.
  1.    Restart your Google Pixel
Sometimes Wi-Fi doesn’t connect or the connection doesn’t load a webpage. In such situation, restarting the device works. While restarting the phone automatically corrects the errors occurring in the phone and works correctly again.
  1.    Check the power saving mode
If you have chosen the power saving mode, you might have forgotten to remove the restriction from Wi-Fi connection. Check the Power saving mode and find out if you have restrictions or not.
  1.    Restart the Router
Maybe the problem is not in your phone and the router’s firmware is not working correctly. You can try switching the router off. After a few seconds, you can restart it and check if the phone is connecting to the Wi-Fi.
  1.    Check your web browser
At times, few applications do not open or work as the phone does not support them. To confirm, try open Google search in your web browser. If you can search then the problem is in the application you are using.
  1.    Check Date and Time in the phone
If the date and time are changed, the phone might face the problem in running the internet. Check if the date and time are changed. If changed, then select auto settings and let your phone change the date and the time.
  1.    Clear cache app data
The apps in your phone save their cache in temporary memory where the password, username and other data is saved. Cache memory might cause an issue which will restrict the phone to connect with Wi-Fi.
To clear the cache,
  •    Go to Settings.
  •    Tap app manager and go to the app you are using.
  •    Tap on it.
  •     Select Clear Cache.
To clear the cache of the applications, do it by selecting the applications individually.
  1.    Disconnect and Reset with Wi-Fi
If the Google Pixel is not connecting with Wi-Fi, try disconnecting the network.
  •    Go to Settings and tap Wi-Fi.
  •    Tap the network you are connected with.
To reset a network,
  •    Go to Settings and tap More.
  •    Select Network settings reset.
  •    Tap Reset to confirm.
  •    Now, restart your phone and try connecting with the Wi-Fi network.
  •    This time, you will need to fill up the password.
Google Pixel is an excellent phone but the “Wi-Fi not connecting” is a common problem faced by its owners. Since it is possible to resolve the issue, you can now apply aforementioned the steps if and when the issue arises.